Phone number verification (or validation) services are online services used to check whether or not a given phone number is in service. Several companies provide SDKs or APIs to integrate this functionality on mobile platforms (iOS/Android).
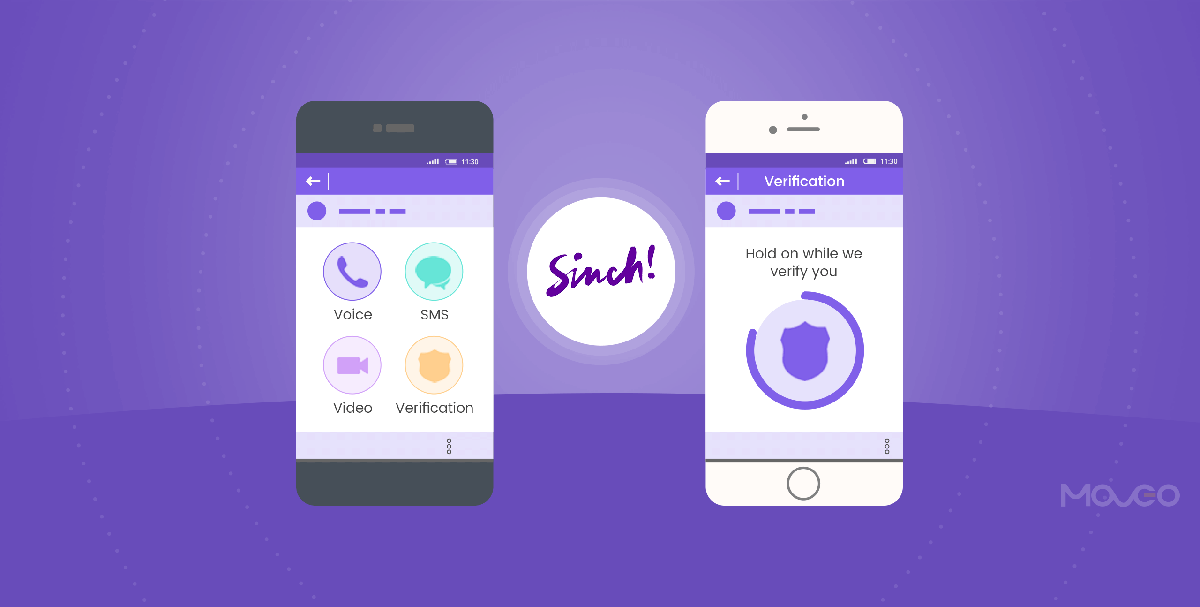
Sinch is platform which provides phone verification, messaging, voice calling and video calling services on mobile platforms. In this article, we will discuss phone number verification.
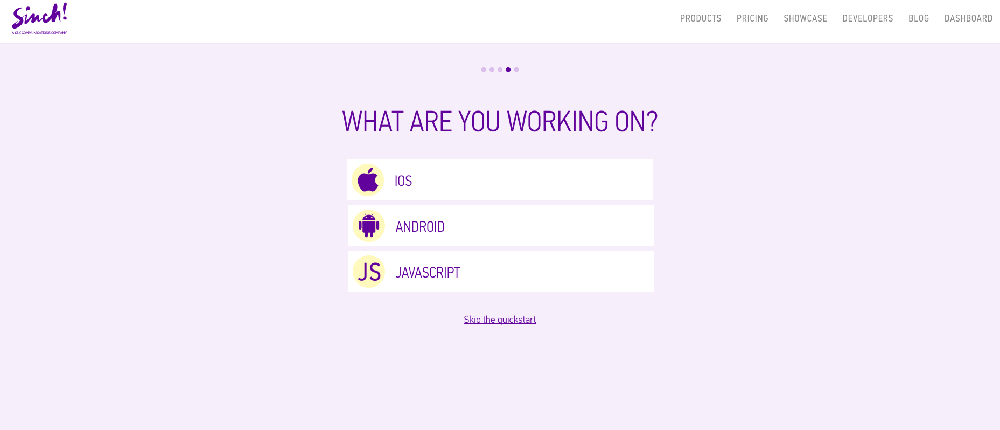
There are two types of verification methods provided by Sinch for iOS:
1) SMS Verification: A one-time pin code will be sent to the phone number via SMS. Sinch can verify the user’s phone number with that pin code.
2) Voice/Callout Verification: An automated voice verification call is made to the user and a voice prompt is made via text-to-speech. An appropriate response to the voice prompt determines if the phone number is in service.
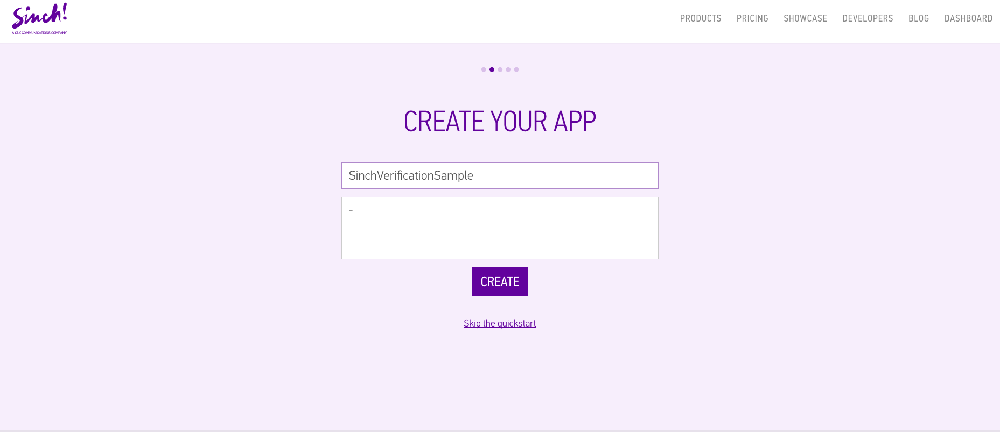
We will now learn about SMS verification programming. For this, first create an app on Sinch Developer account.
Create App on Sinch
Upon registration, you will be asked to create a new app. This is where you need to provide an application name and description.
After this, you will be asked to specify the task you want to perform – verification or calling. Select ‘#VERIFICATION.’
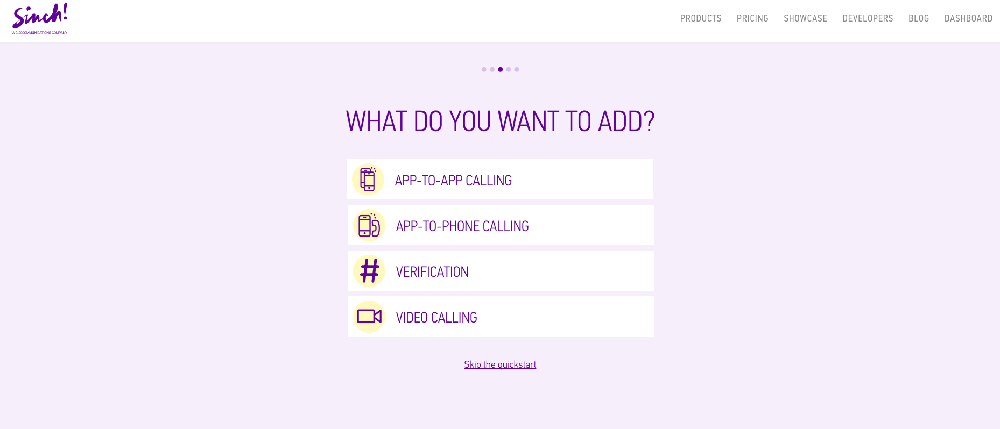
Finally, you will be asked to specify the platform. Select ‘iOS.’
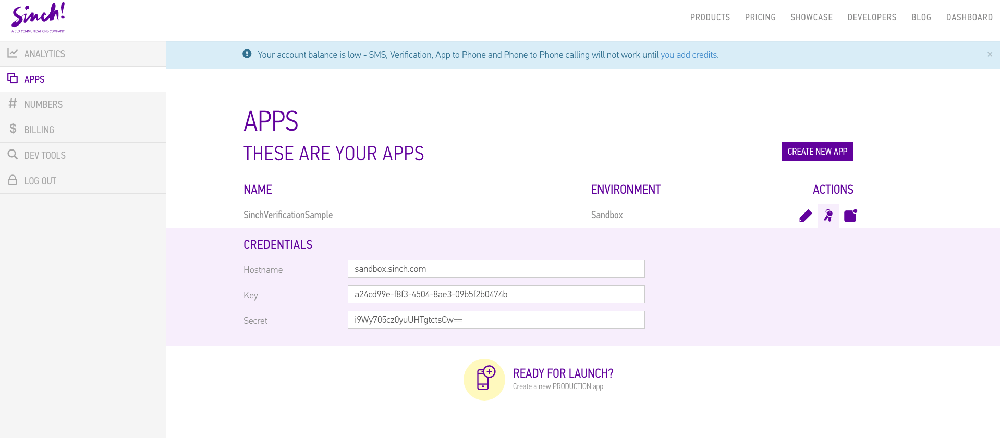
Application credentials are available on Sinch Dashboard, which will be used in the code. Hostname, Key and Secret will be used inside the Xcode project.
Setup Sinch SDK in Xcode
Install through CocoaPods
Install Sinch via CocoaPods (pod ‘SinchVerification’ or pod ‘SinchVerification-Swift’) or download it on https://www.sinch.com/downloads/
Pod File coded as follows:
Objective-C
# Uncomment the next line to define a global platform for your project
platform :ios, '9.0'

target 'SinchVerificationObjC' do
  # Uncomment the next line if you're using Swift or would like to use dynamic frameworks
  # use_frameworks!

  # Pods for SinchVerificationObjC

    pod 'SinchVerification'

end
Swift
# Uncomment the next line to define a global platform for your project
platform :ios, '9.0'

target 'SinchVerificationSwift' do
  # Comment the next line if you're not using Swift and don't want to use dynamic frameworks
  use_frameworks!

  # Pods for SinchVerificationSwift

    pod 'SinchVerification-Swift'

end
Read also:Decoding Xcode 9 – 7 Things You Should Be Aware Of
Let’s Learn about SMS Verification by Sinch
Verification of a phone number is performed in two steps, a verification SMS is requested and a verification code (a 4-digit pin number) for that particular verification session is sent to the recipient via SMS. It’s the responsibility of the developer to ask the end-user to provide the verification code from the SMS.
Request for SMS Verification:
For this process, you have to create an object of Sinch Verification and use that object to initialize the verification process.
For the request you have to pass two parameters with the function – (a). The Sinch Application Key from credentials of app, which is available on the Sinch dashboard, and (b). The formatted phone number, like (+xx xxxxxxxxxx). If you don’t provide a properly formatted phone number, the Sinch verification throws a specific error (In the sample code below, I have displayed error in alert).
Declaration:
Objective-C
#import

@interface PhoneNumberEntryVC : UIViewController {
    id _verification;
}
Swift
import SinchVerification

class PhoneNumberEntryVC: UIViewController {
    var verification : Verification!
}
Initialization:
Objective-C
_verification = [SINVerification SMSVerificationWithApplicationKey:@"SINCH API KEY" phoneNumber:@"PHONE NUMBER"];
[_verification initiateWithCompletionHandler:^(id  _Nonnull result, NSError * _Nullable error) {
    if (result.success == YES) {
        //Process the flow and display UI for verification of code
    }
    else {
        UIAlertController *alertVC = [UIAlertController alertControllerWithTitle:@"" message:error.localizedDescription preferredStyle:UIAlertControllerStyleAlert];
        [alertVC addAction:[UIAlertAction actionWithTitle:@"Ok" style:UIAlertActionStyleCancel handler:nil]];
        [[UIApplication sharedApplication].keyWindow.rootViewController presentViewController:alertVC animated:YES completion:nil];
    }
}];
Swift
verification = SMSVerification("SINCH API KEY", phoneNumber: "PHONE NUMBER")
verification.initiate { (initiationResult, error) in
    if initiationResult.success == true {
        //Process the flow and display UI for verification of code
    }
    else {
        let alertVC = UIAlertController(title: "", message: error?.localizedDescription, preferredStyle: UIAlertControllerStyle.alert)
        alertVC.addAction(UIAlertAction(title: "Ok", style: UIAlertActionStyle.cancel, handler: nil))
        UIApplication.shared.keyWindow!.rootViewController!.present(alertVC, animated: true, completion: nil)
    }
}
With the above code, you will get an SMS on the provided phone number, containing the verification code (generally a 4-digit number).

Validation of verification code:
To complete verification of the phone number, the user has to enter the code from the SMS into the application.
For validation, you have to enter the code which is SMSed to your phone. This code will be passed to the object we created in the first screen. So, if you are managing two screens for this process, then you have to pass the first screen object to the second screen.
Objective-C
[self.verification verifyCode:@"VERIFICATION CODE" completionHandler:^(BOOL success, NSError* error) {
 if (success) {
 // Phone number was successfully verified, do further process.
 } else {
 // Ask user to re-attempt verification
 UIAlertController *alertVC = [UIAlertController alertControllerWithTitle:@"" message:error.localizedDescription preferredStyle:UIAlertControllerStyleAlert];
 [alertVC addAction:[UIAlertAction actionWithTitle:@"Ok" style:UIAlertActionStyleCancel handler:nil]];
 [[UIApplication sharedApplication].keyWindow.rootViewController presentViewController:alertVC animated:YES completion:nil];
 }
}];
Swift
verification.verify("VERIFICATION CODE") { (isSuccess, error) in
 if isSuccess == true {
 // Phone number was successfully verified, do further process.
 }
 else {
 let alertVC = UIAlertController(title: "", message: error?.localizedDescription, preferredStyle: UIAlertControllerStyle.alert)
 alertVC.addAction(UIAlertAction(title: "Ok", style: UIAlertActionStyle.cancel, handler: nil))
 UIApplication.shared.keyWindow!.rootViewController!.present(alertVC, animated: true, completion: nil)
 }
}
The SMS verification process is done! You can now display to users that they have successfully verified their phone number.
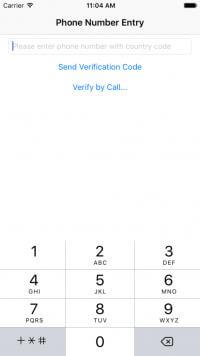
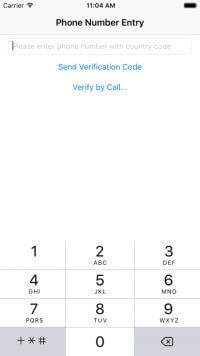 |
 |
 |
Note: Your user interface design should be like this.
Let’s Learn about Voice/Callout Verification by Sinch
Verification of phone number with Callout is performed in only one step. A call will be requested with phone number. Voice verification will call to a user’s phone and play a voice to verify the user. User will be asked to act as per instructions on call.
Similar to SMS verification, Sinch provides functionality to initialize verification object by call functionality. You have to enter the Sinch API key and formatted phone number.
Initialize the verification object by callout verification.
Objective-C
_verification = [SINVerification calloutVerificationWithApplicationKey:SINCH_APP_KEY phoneNumber:@"PHONE NUMBER"];
Swift
verification = CalloutVerification(SINCH_APP_KEY, phoneNumber: "PHONE NUMBER")
After the initialization of verification, initiate the verification process.
Objective-C
[_verification initiateWithCompletionHandler:^(id _Nonnull result, NSError * _Nullable error) {
 if (result.success == YES) {
 // Phone number was successfully verified, do further process.
 }
 else {
 UIAlertController *alertVC = [UIAlertController alertControllerWithTitle:@"" message:error.localizedDescription preferredStyle:UIAlertControllerStyleAlert];
 [alertVC addAction:[UIAlertAction actionWithTitle:@"Ok" style:UIAlertActionStyleCancel handler:nil]];
 [[UIApplication sharedApplication].keyWindow.rootViewController presentViewController:alertVC animated:YES completion:nil];
 }
}];
Swift
verification.initiate { (initiationResult, error) in
 if initiationResult.success == true {
 self.performSegue(withIdentifier: "pushToSuccessVC", sender: nil)
 }
 else {
 let alertVC = UIAlertController(title: "", message: error?.localizedDescription, preferredStyle: UIAlertControllerStyle.alert)
 alertVC.addAction(UIAlertAction(title: "Ok", style: UIAlertActionStyle.cancel, handler: nil))
 UIApplication.shared.keyWindow!.rootViewController!.present(alertVC, animated: true, completion: nil)
 }
}
If the phone number formatting is not done properly, or the phone number field is empty or the callout verification is not verified on the user’s phone, you will get an error.
You can say it is a one-step authorization process. Callout Verification process is now complete! You can display to users that they have successfully verified their number.
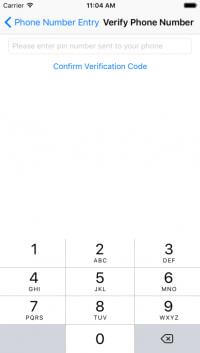
 |
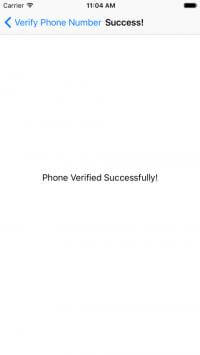 |
Note: Your user interface design should be like this.
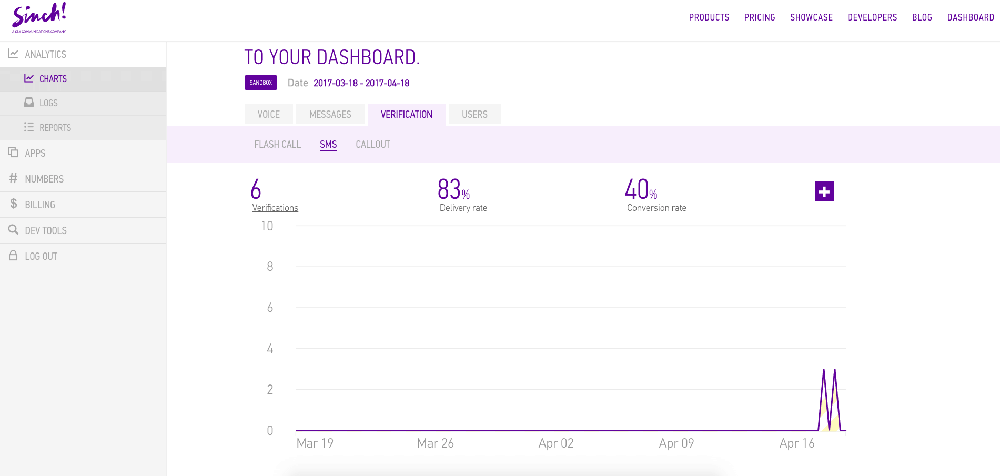
Reports of Verification
Reports are available on the Sinch dashboard. Log in with your account and find the reports as well as charts for the verification, voice, messages, and more.
That’s it! This is how you can perform SMS verification and Callout verification using Sinch.
Hope you liked the article.
Happy Coding!
Read also:Migrating Your Objective-C Programs to Swift – A Simplified Guide for iOS Developers