At the WWDC-2017, Apple introduced iOS11 with a bouquet of new and advanced features for the iOS users. From stunner features like Multitasking and ARKit, to advances in existing frameworks like AVFoundation and Metal made WWDC 2017 worth the wait.
Apple never misses a chance to bring something exciting for developers. During WWDC-2017 too, Apple upheld its reputation and introduced several advanced and exciting Frameworks that will further help developers create nuanced and high-performance apps.
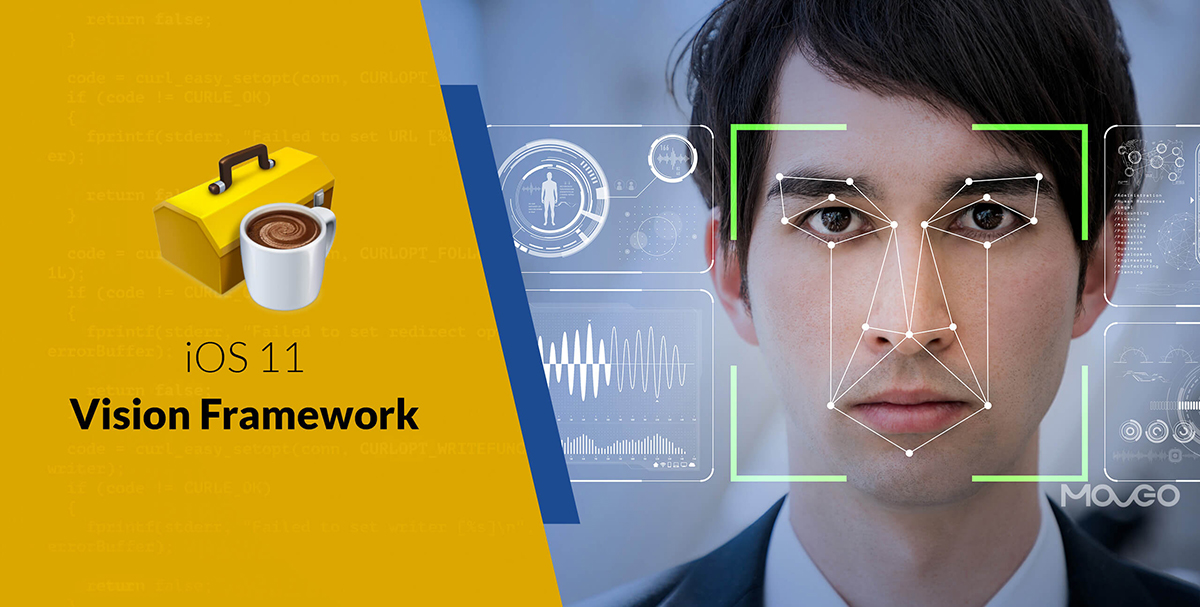
One of these new and exciting frameworks is Vision. It is a framework that lets you apply high-performance image analysis to detect, sort and classify images and video, letting developers take their imagination to the next level. In this article, let’s explore this amazing new technology and take a look at all the things we can do with it.
What is Vision Framework?
Vision is a Framework that lets you apply high-performance image analysis and computer vision technology to images and videos, thus automatically identifying faces, detecting features and classifying scenes. It also detects barcodes, text, features and object tracking, making it an incredible tool for sorting and filtering large numbers of image files and videos.
Here’s what Brett Keating had to say when introducing Vision at the WWDC 2017 –
“(It is a) High-level on-device solutions to computer vision problems through one simple API”.
Things you can do with Vision.
There’s a whole arsenal of powerful features Vision offers. Using Core ML and deep learning, it gives you a great deal of precision and higher recall than any earlier technology. This is what enables Vision to accurately detect faces even with glasses or hats and scarves. It works exceptionally well even inside views, partially blocked faces or any other strong profiles with ease. To list out a few, here are the key capabilities you can find in Vision:
- Determine face rectangle and face landmarks i.e. eyes, brows, nose, lips.
- Recognize and identify text and barcode.
- Recognize and identify rectangular surface.
- Image registration.
- Identify the horizon angle in an image.
- Object tracking from Image and Video frames.
- Integration with CoreML allows you to use custom models with ease.Now that is an impressive list. But if you’re feeling intimidated by the sheer number of features Vision packs, don’t be. There is no steep learning curve or much homework to do. Vision is easy to learn and use. With traditional and deep learning algorithms, it handles complexities easily, making your job simple.
Vision Concept
The simple mechanism Vision follows to obtain computer vision is:
Request, Request Handler and the Result of that request.
 Before moving ahead with the code snippet, let’s see the base classes and categories of Vision. Under the roof, there are 3 main class categories:
VNRequest
This is the abstract superclass for image analysis requests. You can ask Vision to do something using this request. It has a request completion handler and an array of results. i.e.
VNDetectFaceRectanglesRequest for Face detection.
VNDetectBarcodesRequest for Barcode detection.
VNDetectTextRectanglesRequest for Text region.
VNImageRequestHandler, VNSequenceRequestHandler
Request will execute one of the two kinds of request handlers, along with a completion block. It can execute more than one request on given image.
VNObservation
This is the abstract superclass for image analysis results. Result array will populate with ‘Observation’.
Last but not the least, there is VNError for error handling in Vision.
Best Practices
When introducing Vision, Apple described the following areas for Best Practices.
1. Which image type is right for me?
- Vision supports a wide variety of image types including CVPixelBufferRef, CGImageRef, CIImage, NSURL, and NSData.
- You can choose the image type based on where it comes from.
- CVPixelBuffer comes from CMSampleBuffer and it produces VideoDataOut of a camera stream. This is a low-level format just to provide image data in memory.
- If your image is saved on your disk, you can use URL and if your image comes from web, use NSData. Wherever possible, Vision will do the scaling without reading the full image. There is no need to specify the EXIF orientation data for URL type images unless you want to override the default one.
- If you are using Core Image, use
- You also can use CGImageRef from UIImage or NSImage, CGImage if image is UI based or comes through Image Picker.
2. What Am I Going to Do with the Image?
- Use handler (VNImageRequestHandler/VNSequenceRequestHandler) according to your use. i.e VNImageRequestHandler. This will hold the image for some time.
- Remember that the input image is immutable and be sure not to pre-scale it.
3. What Performance Do I Need or Want?
- Task performed using Vision can be time-consuming so factor that in.
- Run your Vision task on a different queue and not the main queue. It is advisable to run it on a background queue so the UI doesn’t get blocked by Vision task.
- Keep in mind that if you want to update the UI, you need to dispatch back to the main queue.
Let’s See Some Code Snippets
Time to get to work with Vision. Let’s take a closer look at the code to see how we can detect faces from an image.
- Things you need to work with Vision are XCode9 and a device with iOS11 to test your code.
- First of all, choose the image which you want to detect the face(s) in.
- Now begin with importing Vision Framework to get an access to its API in your ViewController/Class.
import Vision
- First, we will create the Request to detect Face(s) from the image. It’ll be VNDetectFaceRectanglesRequest in our case. You can also use other requests according to your use. i.e VNDetectBarcodesRequest, VNDetectTextRectanglesRequest, etc.
var faceDetectionRequest : VNDetectFaceRectanglesRequest = {

 let faceRequest = VNDetectFaceRectanglesRequest(completionHandler:self.handleFaceDetection)

 return faceRequest

}()
where handleFaceDetection will handle your result after performing Vision task.
- The VNImageRequestHandler will execute your request. You can choose any initialization method according to your Vision task and mean, while you will have to take care of your image type to pass it as a parameter.
let handler = VNImageRequestHandler(cgImage: cgImage, options: [:]) do { try handler.perform([self.faceDetectionRequest]) } catch { print("Failed to perform classification.\n\(error.localizedDescription)") } - The results are wrapped in “observations”. The execution of your handler will generate the result according to your request. In our case, the handleFaceDetectionwill generate the result of our faceDetectionRequest. Due to the updating of UI, some lines of the code will execute under main.
func handleFaceDetection (request: VNRequest, error: Error?) {

    guard let observations = request.results as? [VNFaceObservation]
    else {
        print("unexpected result type from VNFaceObservation")
        return
    }

    DispatchQueue.main.async {
        for face in observations
        {
            let view = self.createBoxView(withColor: UIColor.red)
            view.frame = self.transformRect(fromRect: face.boundingBox, toViewRect: self.yourImageView)
            self.yourImageView.addSubview(view)
        }
    }
}
- In above snippet, the observations return the array of type VNFaceobservation And to draw a square on faces from the image you can use one of the below methods or you can write your own custom methods.
func transformRect(fromRect: CGRect , toViewRect :UIView) -> CGRect {

    //Convert Vision Frame to UIKit Frame

    var toRect = CGRect()
    toRect.size.width = fromRect.size.width * toViewRect.frame.size.width
    toRect.size.height = fromRect.size.height * toViewRect.frame.size.height
    toRect.origin.y =  (toViewRect.frame.height) - (toViewRect.frame.height * fromRect.origin.y )
    toRect.origin.y  = toRect.origin.y -  toRect.size.height
    toRect.origin.x =  fromRect.origin.x * toViewRect.frame.size.width
    return toRect

}

func createBoxView(withColor : UIColor) -> UIView {

    let view = UIView()
    view.layer.borderColor = withColor.cgColor
    view.layer.borderWidth = 2
    view.backgroundColor = UIColor.clear
    return view
}
- Let’s consider the following UI to begin with detecting faces using Vision.
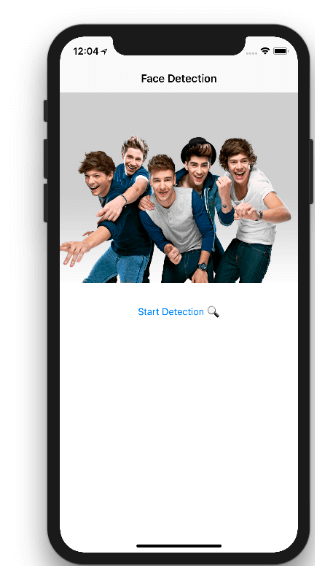
- In the above UI, we can see a ‘Start Detection’ button. After initializing VNDetectFaceRectanglesRequest, theVNImageRequestHandler will execute in the IBAction of this button.
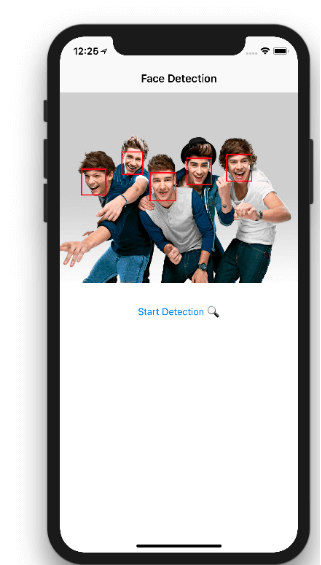
- And finally, the observation of the image will go under handleFaceDetection and the UI will change as follows, and you will see red squares on faces in the image.
Conclusion
So there you have it, a complete guide to what Vision is and what it can do. it truly is a sophisticated little piece of technology. It is a new high-level framework for Computer Vision, which is the best among all other frameworks to get image processing. It obtains the highest accuracy in very low processing time without any latency. Features like privacy of users’ data, consistent interface, no cost and real-time use case makes Vision even more efficient. Now that you know just how to use Vision, get started and explore its vast potential for yourself. Happy coding!

I need the GitHub link for face detection in iOS swift.
i need this project in iphone camera click image .heic file not supporting framwork. this problem solution give me.